pgmpy使用
安装
安装pip
sudo apt-get install python-pip
安装依赖包
pip install networkx
pip install numpy
pip install scipy
pip install pandas
pip install pyparsing
pip install wrapt
安装pgmpy
pip install pgmpy
测试
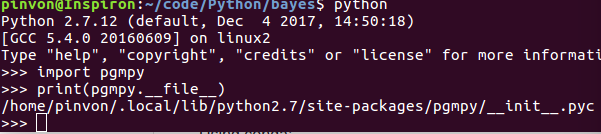
在命令行输入 python:
import pgmpy
print(pgmpy.__file__)
如果打印的内容类似下图, 说明安装成功:
使用
直观感受
创建文件 test.py, 将以下代码直接拷贝进去.
import networkx as nx
from pgmpy.models import BayesianModel
from pgmpy.factors.discrete import TabularCPD

import matplotlib.pyplot as plt

model = BayesianModel([('D', 'G'), ('I', 'G'), ('G', 'L'), ('I', 'S')])

cpd_d = TabularCPD(variable='D', variable_card=2, values=[[0.6, 0.4]])

cpd_i = TabularCPD(variable='I', variable_card=2, values=[[0.7, 0.3]])

cpd_g = TabularCPD(variable='G',
                   variable_card=3,
                   values=[[0.3, 0.05, 0.9, 0.5],
                           [0.4, 0.25, 0.08, 0.3],
                           [0.3, 0.7, 0.02, 0.2]],
                   evidence=['I', 'D'],
                   evidence_card=[2, 2])

cpd_s = TabularCPD(variable='S',
                   variable_card=2,
                   values=[[0.95, 0.2], [0.05, 0.8]],
                   evidence=['I'],
                   evidence_card=[2])

cpd_l = TabularCPD(variable='L',
                   variable_card=2,
                   values=[[0.1, 0.4, 0.99], [0.9, 0.6, 0.01]],
                   evidence=['G'],
                   evidence_card=[3])

model.add_cpds(cpd_d, cpd_i, cpd_g, cpd_l, cpd_s)

print('pinvon', model.check_model())

nx.draw(model,
        with_labels=True,
        node_size=1000,
        font_weight='bold',
        node_color='y',
        pos={"L": [4, 3], "G": [4, 5], "S": [8, 5], "D": [2, 7], "I": [6, 7]})
plt.text(2, 7, model.get_cpds("D"), fontsize=10, color='b')
plt.text(5, 6, model.get_cpds("I"), fontsize=10, color='b')
plt.text(1, 4, model.get_cpds("G"), fontsize=10, color='b')
plt.text(4.2, 2, model.get_cpds("L"), fontsize=10, color='b')
plt.text(7, 3.4, model.get_cpds("S"), fontsize=10, color='b')
plt.title('test')
plt.show()
在终端输入:
python test.py
最后会在当前目录生成一个图片, eog test.png 就可以对贝叶斯网有一个大概的直观认识了.
Generated by Emacs 25.x(Org mode 8.x)
Copyright © 2014 - Pinvon - Powered by EGO
